Delete a file, folder, or link in SharePoint
Important: When you delete a folder, it deletes the folder and any files or subfolders it contains. Consider moving or archiving the contents of the folder before deleting it. You or your administrator might be able to recover a folder and its contents from the recycle bin.
1. In SharePoint, open the document library and select the item you want to delete. (Avoid selecting the file name itself, because that would open the file.) A checkmark appears in the far-left column.
Note: Does your screen look different than this and you're using SharePoint in Microsoft 365 or SharePoint Server 2019? Your administrator might have SharePoint Classic experience set on the document library.
To delete multiple items, repeat this step. You can delete as many items as you want.
2. Select Delete  on
the toolbar above the list.
3. Select Delete in the message box to confirm your action.
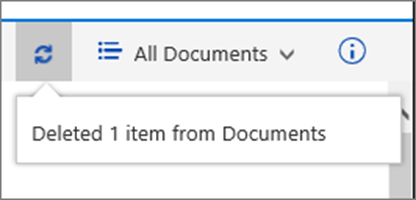
The status box appears in the document library informing you that the item has been deleted.

Specific Feature : Delete a file, folder, or link in SharePoint Classic experience
Important: When you delete a folder, it deletes the folder and any files or subfolders it contains. Consider moving or archiving the contents of the folder before deleting it. You or your administrator might be able to recover a folder and its contents from the recycle bin.
1. Open the SharePoint document library where you want to delete items.
2. To select one or more items that you want to delete, hover over the folder, and then select the checkbox.
3. Right-click a file, folder, or link icon, and then select Delete.
4. In the Delete confirmation dialog, select OK.
Customize permissions for a SharePoint list or library
Important: While SharePoint allows considerable customization of site permissions, we highly recommend using the built-in SharePoint groups for communication sites and managing team site permissions through the associated Microsoft 365 group. You can add, change, or remove permissions for an individual document or folder by following methods mentioned in Share files or folders in Microsoft 365 . This allows for much easier administration.
By default, all sites, lists, and libraries in a site collection inherit permissions settings from the site that is directly above them in the site hierarchy. This is called permission inheritance. Permission inheritance means a site inherits permissions from the root site of the site collection, and a subsite inherits permissions from its parent site. Folders, lists, and documents inherit permissions from the site that contains them, and so on.
Permission inheritance can save time for site administrators, especially on large or complex site collections. However, at times, you may need to change permissions so that you can expand access to invite others to share information or restrict access to a site . As an administrator or owner of a library, list, or survey, you can change permissions in various ways (i.e. assigning unique permissions, changing permission levels, or removing user permissions), to let the right people access the data they need data while restricting others. This article shows you how to get to the Permissions page and break inheritance, and then provides the steps to assign or change permissions.
First, you need to get to the permission page.